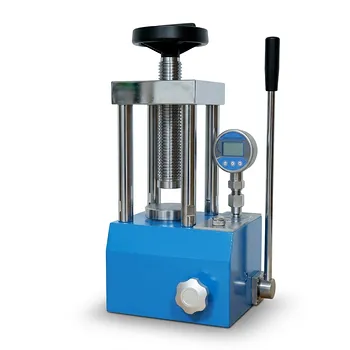
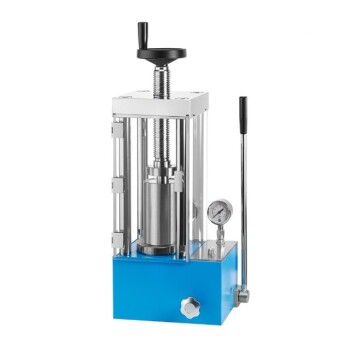
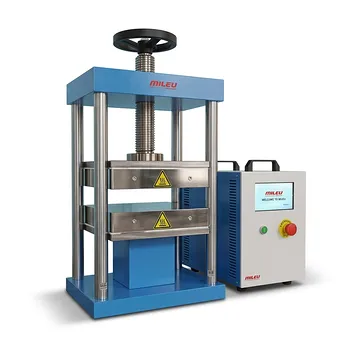
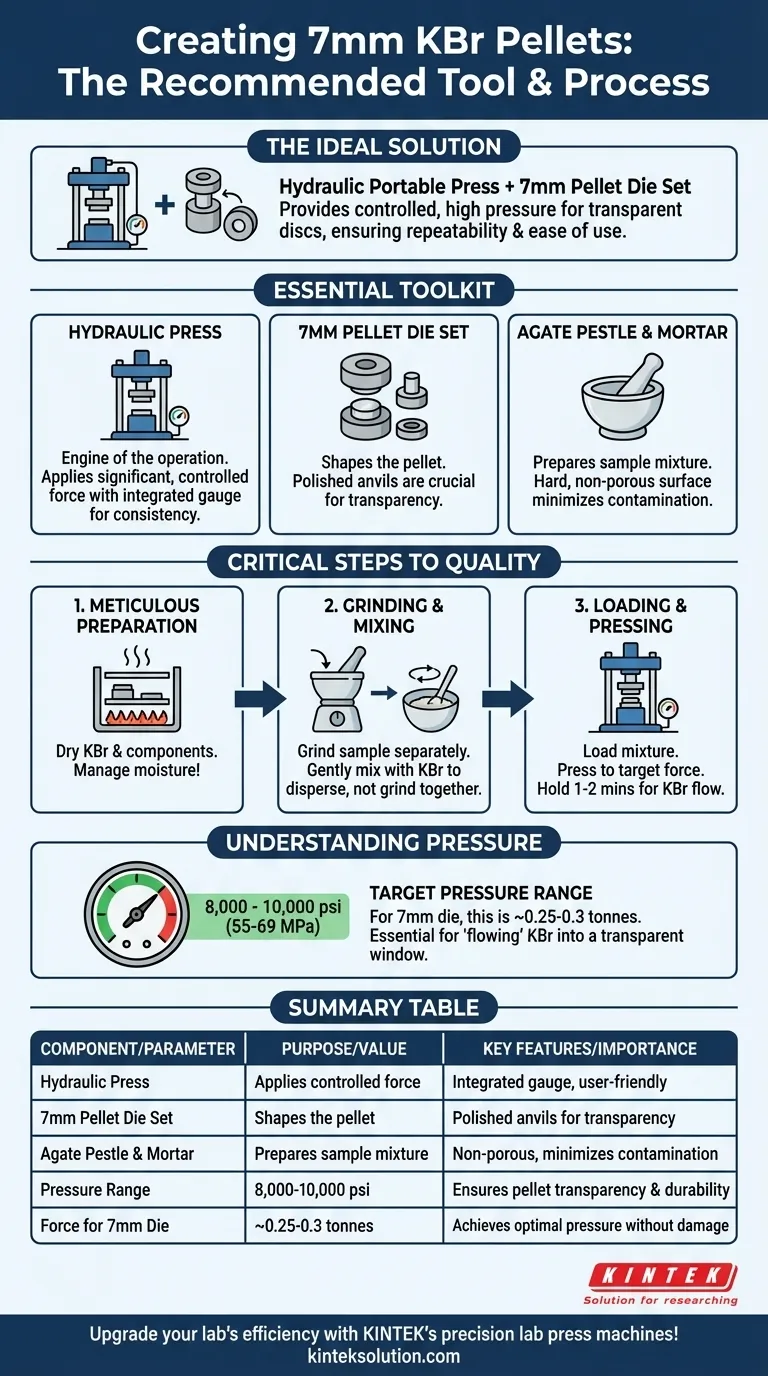
For creating 7-millimeter KBr pellets, the recommended tool is a hydraulic portable press paired with a 7mm pellet die set. This combination provides the controlled, high pressure necessary to form a transparent disc suitable for FTIR analysis, while the press's user-friendly design and integrated gauge ensure repeatability and ease of use for all lab personnel.
The press itself provides the force, but the ultimate quality of your KBr pellet hinges on your technique. Meticulous preparation—specifically managing moisture and correctly mixing your sample—is just as critical as the equipment you use.
The Essential Toolkit for Pellet Preparation
To consistently produce high-quality KBr pellets, you need a few key pieces of equipment. Each plays a distinct and critical role in the process.
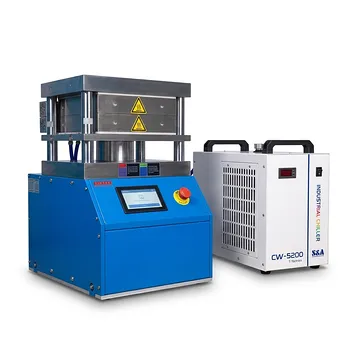
The Hydraulic Press
A hydraulic portable press is the engine of the operation. Its primary function is to apply a significant, controlled force to the die set.
Modern presses are favored for their simplicity, integrated pressure gauges for precise control, and safety features, making the process accessible and repeatable.
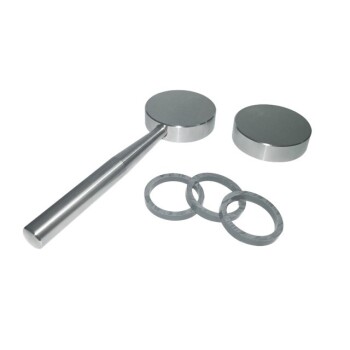
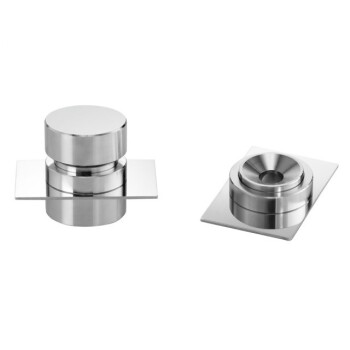
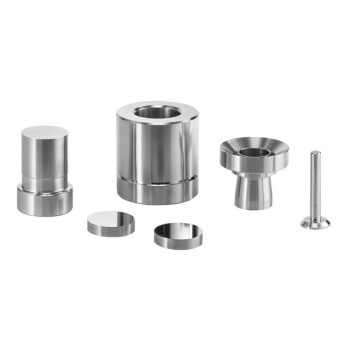
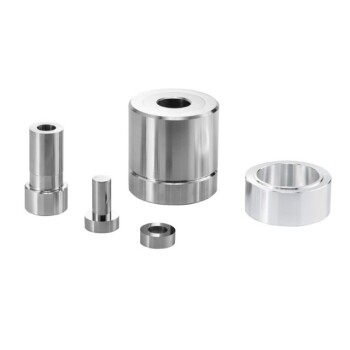
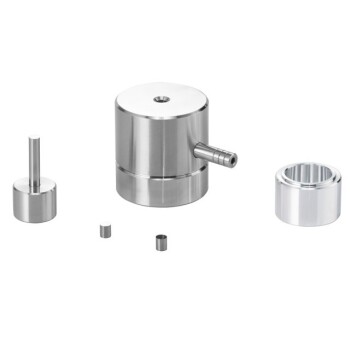
The Pellet Die Set
The die set is what shapes your pellet. It consists of a barrel and two polished anvils (or bolts). The diameter of the barrel dictates the diameter of the final pellet, so a 7mm die set is required for a 7mm pellet.
It is crucial that the anvil faces are clean, unscratched, and perfectly polished to produce a transparent, high-quality pellet.
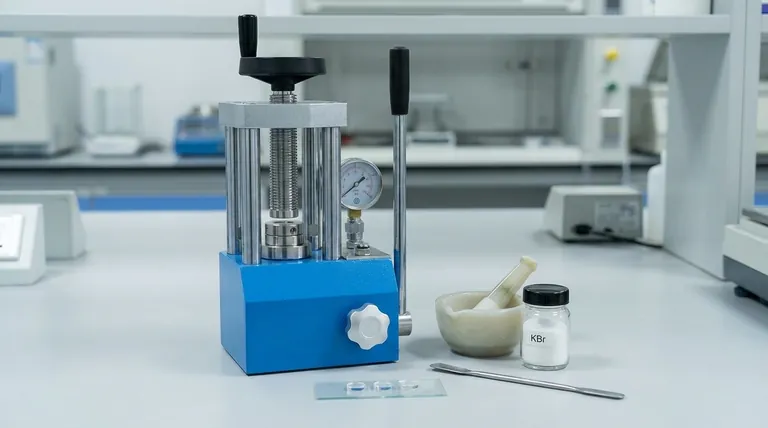
The Pestle and Mortar
You will need a pestle and mortar to prepare the sample mixture. An agate pestle and mortar is strongly recommended.
Its hard, non-porous surface minimizes sample contamination and is easier to clean thoroughly compared to glass or porcelain alternatives.
The Critical Steps to a High-Quality Pellet
The right tools are only half the battle. The procedure itself requires attention to detail to avoid common issues like cloudy or fractured pellets.
Step 1: Meticulous Preparation
Moisture is the primary enemy of a good KBr pellet, as it causes opacity. To combat this, gently heat the die set anvils and use spectroscopy-grade KBr powder that has been thoroughly dried. Ensure all components are at the same temperature before use to prevent condensation.
Step 2: Grinding and Mixing
First, grind your solid sample into a fine powder. It is critical to grind the sample by itself, not with the KBr.
After the sample is ground, add a small amount to the KBr powder and mix them gently. The goal is to disperse the sample within the KBr matrix, not to continue grinding them together, which can damage the sample's structure.
Step 3: Loading and Pressing
Load the KBr-sample mixture into the die barrel, ensuring just enough powder to create a thin, even layer. Assemble the die set and place it into the press.
Gradually increase the pressure using the press's hydraulic crank. Once the target pressure is reached, hold it for one to two minutes to allow the KBr to flow and form a solid, transparent disc.
Understanding the Key Variable: Pressure
Applying the correct amount of force is essential. Too little pressure results in a soft, opaque pellet that will crumble, while too much can fracture the pellet or even damage the die.
Why Pressure Matters
The immense pressure causes the crystalline KBr powder to "flow" and fuse into a single, glassy, infrared-transparent window. The sample is held within this solid matrix, allowing the spectrometer's IR beam to pass through it.
The Target Pressure Range
The recommended pressure is between 8,000 and 10,000 psi (or 55-69 MPa). An integrated pressure gauge on the hydraulic press is invaluable for hitting this target consistently.
For a 7mm diameter die, this translates to a required force of approximately 0.25 to 0.3 tonnes. This is why a simple vise is insufficient and a hydraulic press is necessary for repeatable results.
Making the Right Choice for Your Goal
Selecting the right process depends on what you value most in your analysis.
- If your primary focus is routine, high-throughput analysis: Rely on the hydraulic press with an integrated gauge to ensure speed and consistency between samples.
- If your primary focus is high-quality, artifact-free spectra: Prioritize meticulous preparation, including drying all components and using an agate mortar to minimize contamination.
- If your primary focus is safety and accessibility for all users: The user-friendly design and controlled force application of a portable hydraulic press make it the ideal choice.
Mastering this technique is a fundamental laboratory skill that transforms a simple powder into a window for clear spectroscopic analysis.
Summary Table:
| Component | Purpose | Key Features |
|---|---|---|
| Hydraulic Press | Applies controlled force | Integrated pressure gauge, user-friendly, safe |
| 7mm Pellet Die Set | Shapes the pellet | Polished anvils for transparency, specific diameter |
| Agate Pestle and Mortar | Prepares sample mixture | Non-porous, minimizes contamination |
| Key Parameter | Value | Importance |
| Pressure Range | 8,000-10,000 psi | Ensures pellet transparency and durability |
| Force for 7mm Die | ~0.25-0.3 tonnes | Achieves optimal pressure without damage |
Upgrade your lab's efficiency with KINTEK's precision lab press machines! Whether you're in pharmaceuticals, materials science, or academic research, our automatic lab presses, isostatic presses, and heated lab presses deliver consistent, high-quality KBr pellets for reliable FTIR analysis. Contact us today to discuss how our solutions can enhance your sample preparation and boost productivity!
Visual Guide
Related Products
- Automatic Laboratory Hydraulic Press for XRF and KBR Pellet Pressing
- Laboratory Hydraulic Press 2T Lab Pellet Press for KBR FTIR
- Laboratory Hydraulic Pellet Press for XRF KBR FTIR Lab Press
- XRF KBR Plastic Ring Lab Powder Pellet Pressing Mold for FTIR
- Manual Laboratory Hydraulic Pellet Press Lab Hydraulic Press
People Also Ask
- What are the advantages of using an automatic laboratory hydraulic press? Enhance Precision in Sample Preparation
- How does an automatic laboratory hydraulic press improve KBr pellet preparation? Achieve Precision IR Spectroscopy
- What are the technical advantages of an automatic laboratory hydraulic press for biomimetic surfaces?
- What is the role of a laboratory pressure machine and KBr in FTIR? Master Sample Preparation for Flame Retardants
- Why is pressing powder into a pellet critical before sintering? Ensure Dense, Conductive Solid-State Electrolytes