To prepare a sample for FTIR using a pellet press, you must mix a small amount of your solid sample with a larger amount of an infrared-transparent salt, typically potassium bromide (KBr). This mixture is then ground into an extremely fine, homogenous powder and compressed under high pressure in a die. This process forms a thin, transparent, or translucent solid disc, known as a KBr pellet, which allows the spectrometer's infrared beam to pass through for analysis.
The core challenge in analyzing solid samples with FTIR is ensuring the infrared light can pass through the material without scattering. Creating a KBr pellet is a method of suspending the sample particles in a perfectly transparent matrix, rendering the solid "visible" to the spectrometer.
Why a Pellet is the Gold Standard for Solids
Fourier Transform Infrared (FTIR) spectroscopy works by measuring how much infrared light a sample absorbs at different wavelengths. For this to work with a solid, the material must be prepared in a way that allows light to pass through it cleanly.
The Role of the KBr Binder
Potassium bromide (KBr) is the most common material used for this process. It is chosen because it is transparent to infrared radiation across the typical analysis range (4000-400 cm⁻¹).
Essentially, the KBr acts as a solid-state "solvent." It forms a crystalline matrix that holds your sample particles, allowing the IR beam to interact with them while not contributing any significant absorption peaks of its own.
The Goal: Optical Transparency
The primary objective is to create a pellet that is as transparent as possible. A cloudy or opaque pellet will scatter the IR light, leading to a distorted baseline and poor-quality, noisy spectra. This transparency is achieved through fine grinding and high pressure.
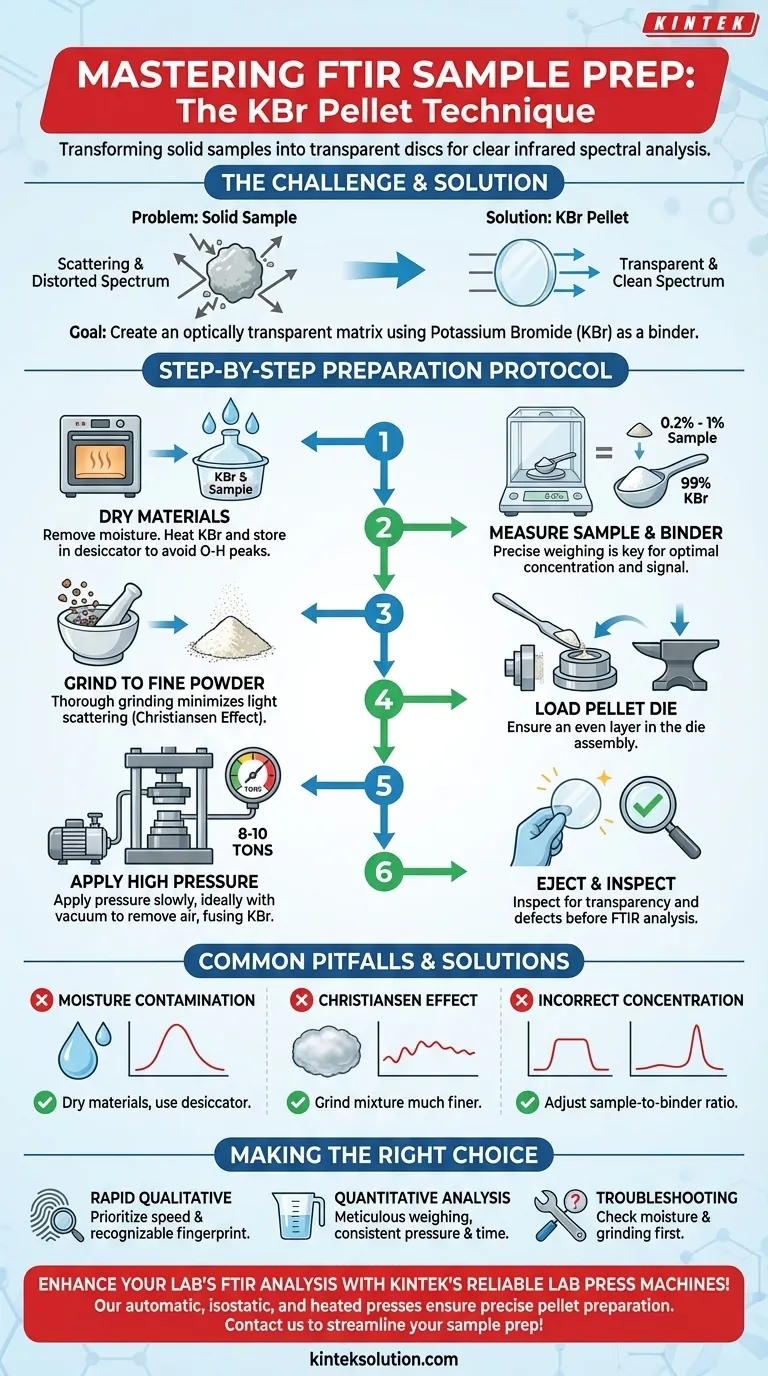
The Step-by-Step Preparation Protocol
Following a precise method is critical for achieving a high-quality, reproducible spectrum. Each step addresses a potential source of error.
Step 1: Prepare the Materials
Before you begin, ensure both your sample and the KBr are completely dry. KBr is hygroscopic (it readily absorbs moisture from the air), and any water will produce large, broad absorption peaks in your spectrum, potentially obscuring important sample peaks.
Gently heating the KBr in an oven and storing it in a desiccator is standard practice.
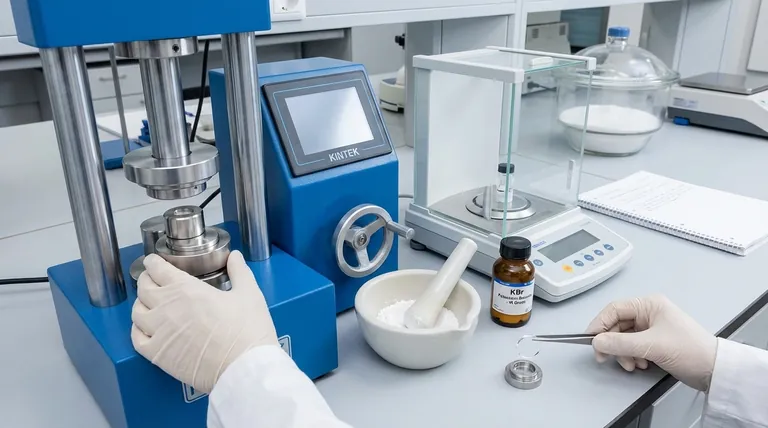
Step 2: Measure the Sample and Binder
The concentration of your sample in the KBr is critical. A typical ratio is 0.2% to 1% sample by weight.
Too much sample will result in a dark, opaque pellet and absorption peaks that are too intense ("bottoming out"). Too little sample will produce a spectrum with a weak signal and poor signal-to-noise ratio. Use an analytical balance for accuracy.
Step 3: Grind the Mixture to a Fine Powder
Combine the weighed sample and KBr in an agate mortar and pestle. Grind the mixture thoroughly for several minutes until it becomes a fine, homogenous powder with a consistent, flour-like texture.
This step is vital for reducing particle size, which minimizes light scattering (an issue known as the Christiansen effect) and ensures the sample is evenly distributed throughout the KBr matrix.
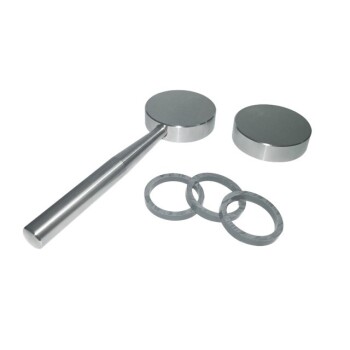
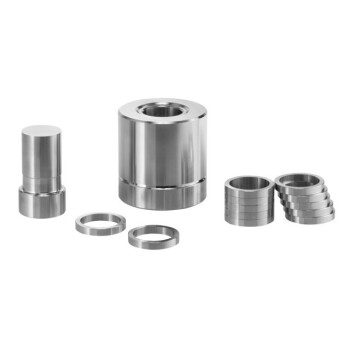
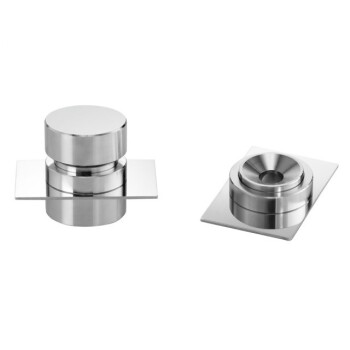
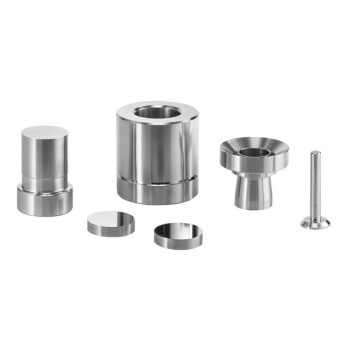
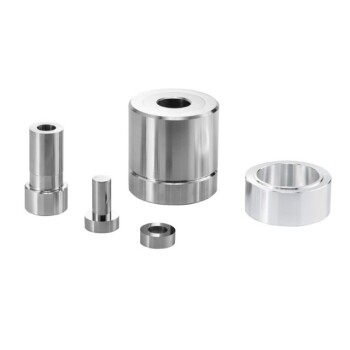
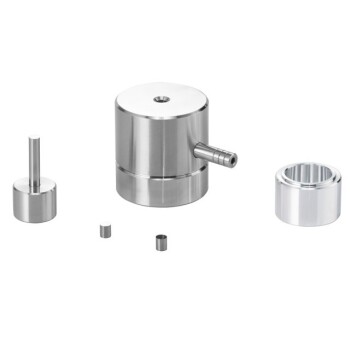
Step 4: Load the Pellet Die
A pellet die consists of a barrel, a base, and two polished anvils (or bolts). Carefully pour the powder mixture into the barrel, ensuring an even layer. Gently tap the die to settle the powder.
Some methods involve assembling the die with one anvil in place, adding the powder, and then inserting the second anvil on top.
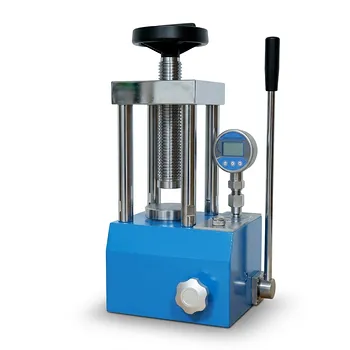
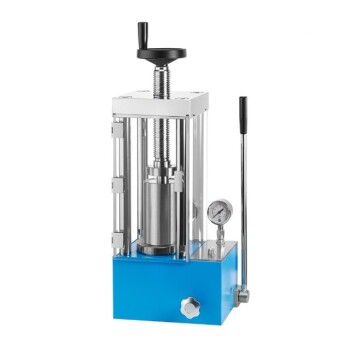
Step 5: Apply Pressure
Place the loaded die into a hydraulic press. Many protocols recommend attaching a vacuum line to the die during pressing to remove any trapped air or residual moisture, which helps create a clearer pellet.
Apply pressure slowly, typically up to 8-10 tons, and hold for a few minutes. This immense pressure causes the KBr to plastic-flow and fuse into a solid, glass-like disc, trapping the sample within its crystal lattice.
Step 6: Eject and Inspect the Pellet
Carefully release the pressure and disassemble the die to eject the finished pellet. A good pellet will be thin, semi-transparent or translucent, and free of cracks or cloudy regions. It is now ready to be placed in the spectrometer's sample holder for analysis.
Understanding Common Pitfalls
Achieving a perfect pellet requires avoiding a few common mistakes that can ruin your spectral data.
The Problem of Moisture
As mentioned, water is a strong IR absorber. If your KBr, sample, or laboratory environment is humid, your final spectrum will be contaminated with large, broad O-H stretch peaks around 3400 cm⁻¹ and a H-O-H bending peak around 1640 cm⁻¹. Always use dry materials.
The Christiansen Effect
If the pellet appears cloudy and the spectral baseline is distorted (often looking like a wavy or skewed derivative), you are likely seeing the Christiansen effect. This is caused by light scattering off particles that are too large. The only solution is to remake the pellet, ensuring you grind the mixture much more finely.
Incorrect Sample Concentration
If all your peaks are flat-topped and at 0% transmittance, your sample is too concentrated. If your peaks are barely distinguishable from the baseline noise, your sample is too dilute. Precise weighing is key to avoiding this.
Making the Right Choice for Your Goal
The level of rigor you apply depends on what you need from the data.
- If your primary focus is rapid qualitative identification: You can prioritize speed, but ensure the pellet is clear enough to produce a clean, recognizable spectral fingerprint free from major moisture contamination.
- If your primary focus is quantitative analysis: You must be highly meticulous. Use an analytical balance, maintain a consistent sample-to-binder ratio, and apply the exact same pressure for the same duration for all samples and standards to ensure reproducibility.
- If you are troubleshooting a poor spectrum: The most likely culprits are moisture contamination or insufficient grinding. Always check for these two issues first before investigating other instrumental factors.
Ultimately, mastering the KBr pellet technique is about controlling variables to produce a uniform sample matrix that is invisible to the spectrometer.
Summary Table:
| Step | Key Action | Purpose |
|---|---|---|
| 1 | Dry materials (KBr, sample) | Prevent moisture interference in spectrum |
| 2 | Measure sample and KBr (0.2-1% ratio) | Ensure optimal concentration for clear peaks |
| 3 | Grind mixture to fine powder | Minimize light scattering and ensure homogeneity |
| 4 | Load powder into pellet die | Prepare for uniform compression |
| 5 | Apply high pressure (8-10 tons) with vacuum | Form transparent, solid pellet |
| 6 | Eject and inspect pellet | Verify quality before FTIR analysis |
Enhance your laboratory's FTIR analysis with KINTEK's reliable lab press machines! Our automatic lab presses, isostatic presses, and heated lab presses ensure precise, reproducible pellet preparation for accurate results. Whether you're in research, quality control, or materials testing, KINTEK's equipment helps you avoid common pitfalls like moisture contamination and poor grinding. Contact us today to discuss how our solutions can streamline your sample prep and boost your lab's efficiency!
Visual Guide
Related Products
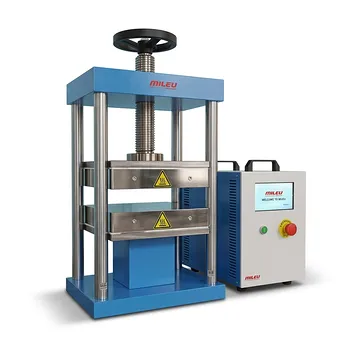
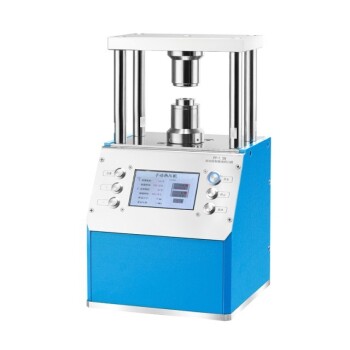
- Laboratory Hydraulic Press 2T Lab Pellet Press for KBR FTIR
- XRF KBR Plastic Ring Lab Powder Pellet Pressing Mold for FTIR
- Laboratory Hydraulic Pellet Press for XRF KBR FTIR Lab Press
- XRF KBR Steel Ring Lab Powder Pellet Pressing Mold for FTIR
- Automatic Laboratory Hydraulic Press for XRF and KBR Pellet Pressing
People Also Ask
- Why is uniform encapsulation pressure necessary for lithium-metal battery assembly? Achieve Flawless In-Situ Results
- Why is a laboratory hydraulic press used to compact monazite samples before the roasting treatment? Optimize Reactions
- What is the role of a laboratory hydraulic press in high-loading NCM811 cathode prep for solid-state batteries?
- What role does a laboratory hydraulic press play in molding polymer composites? Ensure Specimen Integrity & Precision
- How does the application of a laboratory hydraulic press improve the performance of Tungsten Trioxide (WO3) electrodes? - Pro Tips